Spring Cleaning: Deck Edition
If you’ve had your deck for a while, you’ve probably noticed that the shine has, quite literally, worn off over the years. Exposure to the elements, direct sunlight, and other natural factors simply aren’t too friendly to your once-lovely deck, and it can really start to be a drag.
But turn that frown upside down – bringing your deck back to life and restoring it to a vibrant, beautiful outdoor retreat is far from impossible. In fact, it’s pretty darn easy! That’s why we’ve put together this spring cleaning guide that’ll help you get your deck back to beauty before summer!
Getting Rid of the Green & Gray

Image Credit: Houzz (www.houzz.com)
The first thing you’ve probably noticed about your deck is that the surface isn’t just dingy, it’s probably a totally different color than you started out with. The once lustrous finish has probably been worn down and replaced with a drab greenish-gray color that is just downright ugly. Don’t worry – your deck is still under there somewhere!
The best time to give your deck a bath is in early- to mid-spring, when it’s still relatively cool outside. Washing your deck in the summer, in the heat of day with the sun beating down, is really hard on the wood and may damage it in the long run. It may not be fun, being outside with a hose if it’s a little chilly, but it’s the optimal time to clean your deck.
Using an oxygenated bleach cleaner (chlorine bleach is just too astringent for wooden decks), take a soft scrub brush – no power washer needed – and give your deck a good scrubbing. Be sure to test the cleaner’s strength in a small area first – it should only take about fifteen minutes to kill mildew and lift dirt, so if it takes more time strengthen the mixture, and if it takes less, water it down.
Dig In – But Not Too Hard!
Once your deck has been cleaned and is totally dry, it’s time to remove the last vestiges of the old finish – break out a random orbit floor sander (you can rent one from your local home improvement store if needed), slap on some 60- to 80-grit sandpaper, and go to town. Be sure to follow the manufacturer’s instructions to get a nice, smooth surface and avoid digging too deep into the wood. As for the edges of your deck, your best bet is to finish up with a handheld orbital sander, to make sure you’ve got a properly prepared surface all the way around.
Prep & Stain

Image Credit: HGTV (www.hgtv.com)
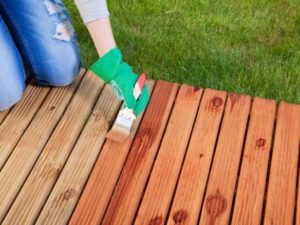
The final step of revitalizing your faithful old deck is to refinish it with a weatherproofing layer of high quality stain/sealant. Before you start staining, give your deck one more inspection and make sure that any exposed screws or nails are below the surface of the wood.
Once you’ve selected your finishing material (brand and color), use a natural bristled brush and follow the manufacturer’s instructions to apply your stain or sealant correctly. Remember – more stain is NOT better, and over-applying your sealant can actually cause the material to not dry properly, leading to peeling and cracking when exposed to moisture.
If you’re planning on refinishing your deck but are feeling overwhelmed, there’s no shame in asking for help. Your local fence and deck professionals at Excel Fence & Deck can assist you in saving your deck and making it a space you can enjoy for years to come.
